Redefine Success
DIY Wooden Egg Cactus (No Water Required!)
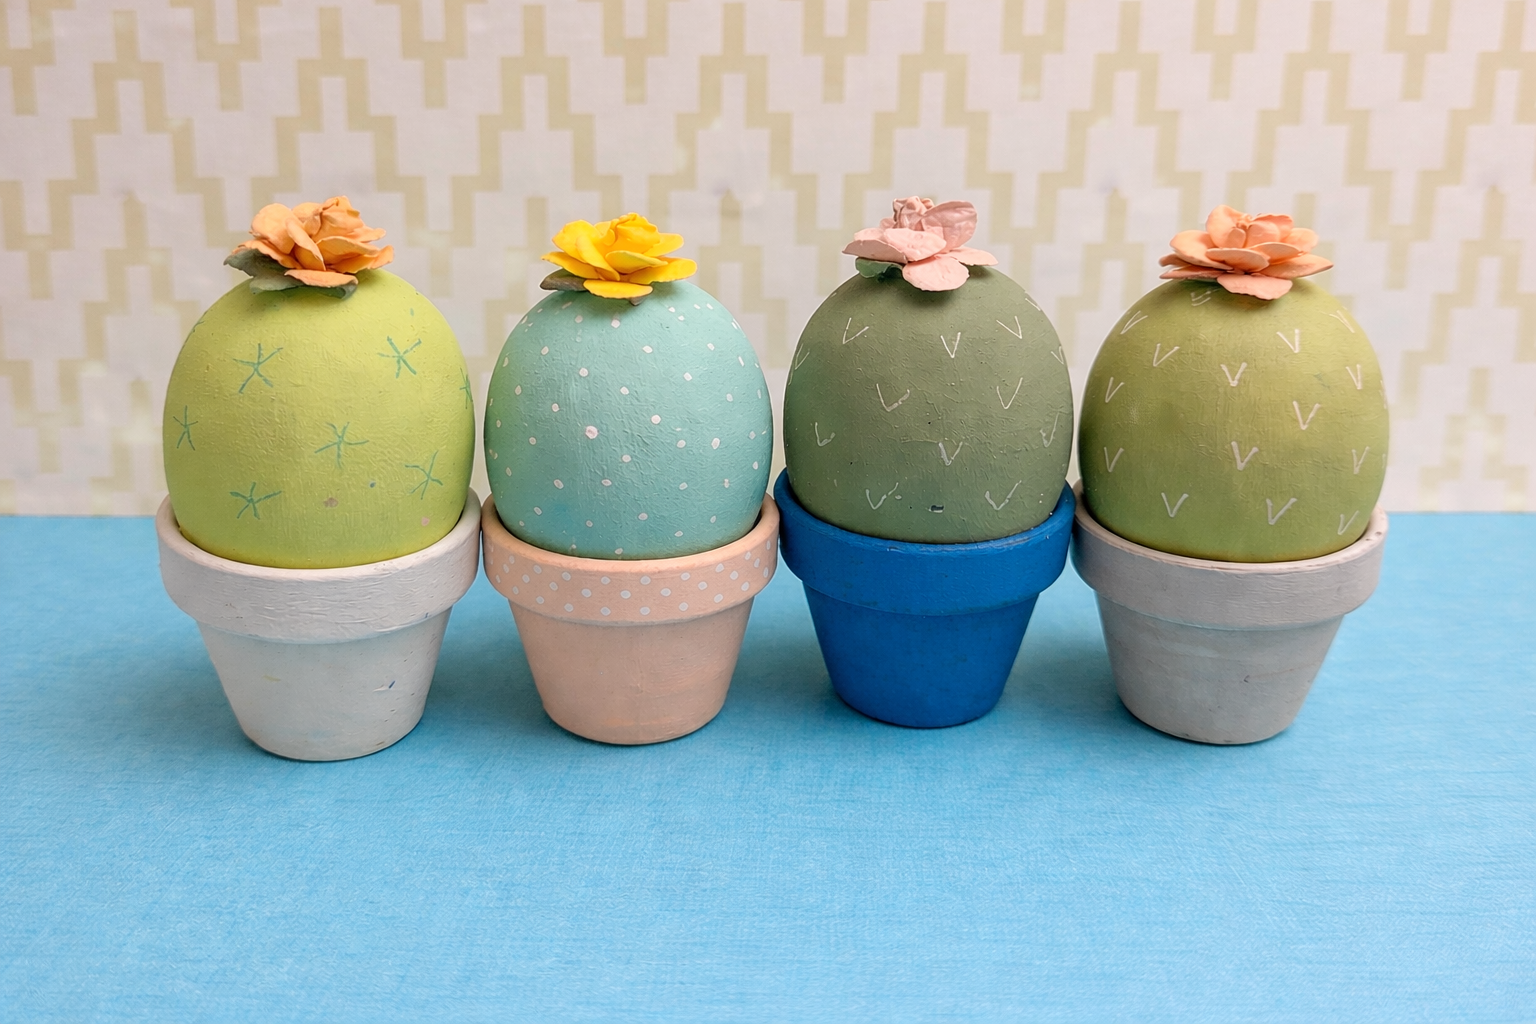
If you love the look of cute little cacti but don’t trust yourself to keep plants alive (same 😅), this simple DIY is the perfect solution. These painted wooden egg cacti are bright, cheerful, and totally customizable—and they make adorable decor for shelves, desks, or gifts.
The best part? You only need a few craft store supplies and about an hour to make your own mini cactus garden.
What You’ll Need
Here are the materials I used (linked so you can easily find them):
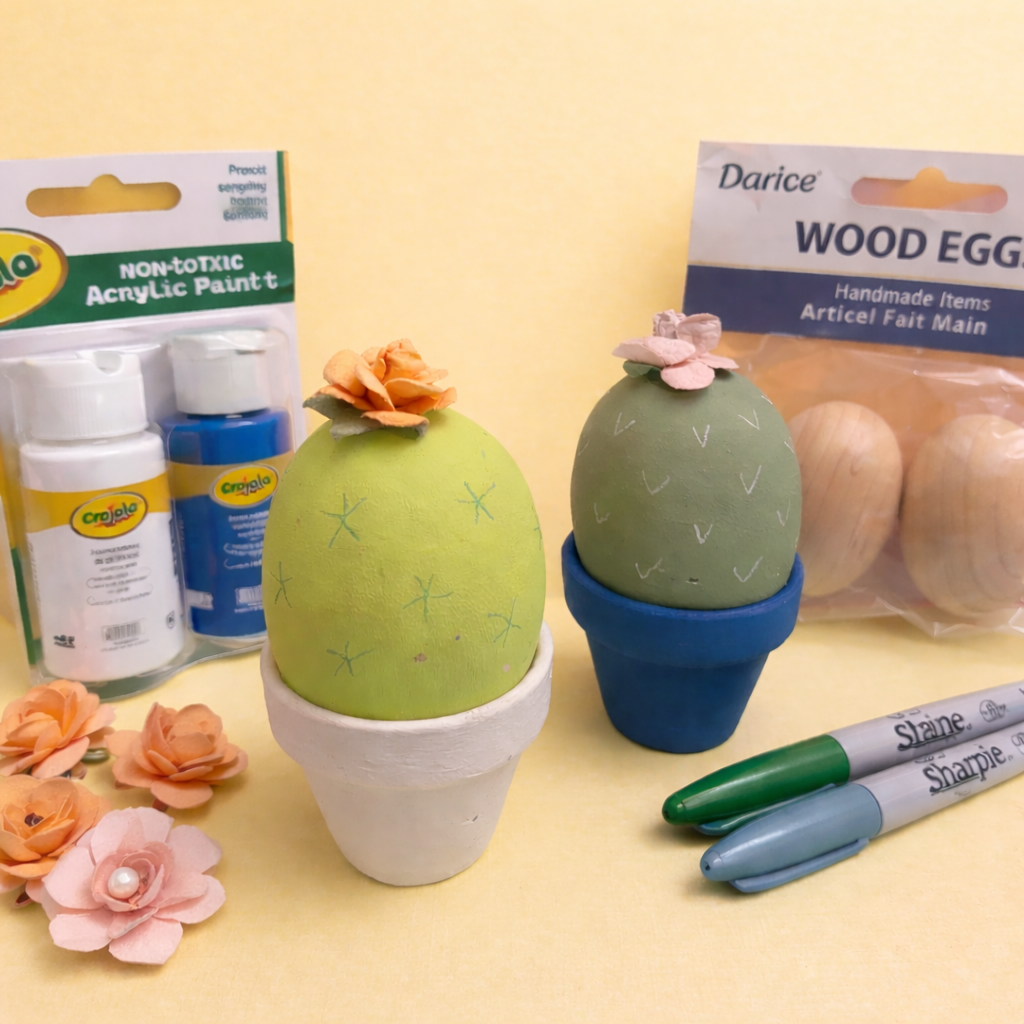
Wooden eggs (similar to these):
https://www.amazon.com/s?k=wooden+eggs+craftMini terracotta pots:
https://www.amazon.com/s?k=mini+terracotta+potsAcrylic paint (greens, white, blue):
https://www.amazon.com/s?k=acrylic+paint+setPaint brushes:
https://www.amazon.com/s?k=paint+brush+set+acrylicFine-tip markers (for cactus details):
https://www.amazon.com/s?k=fine+tip+paint+markersPaper flowers (or make your own):
https://www.amazon.com/s?k=paper+craft+flowersHot glue gun + glue sticks:
https://www.amazon.com/s?k=hot+glue+gun
How to Make Your Wooden Cactus
1. Paint the “cactus”
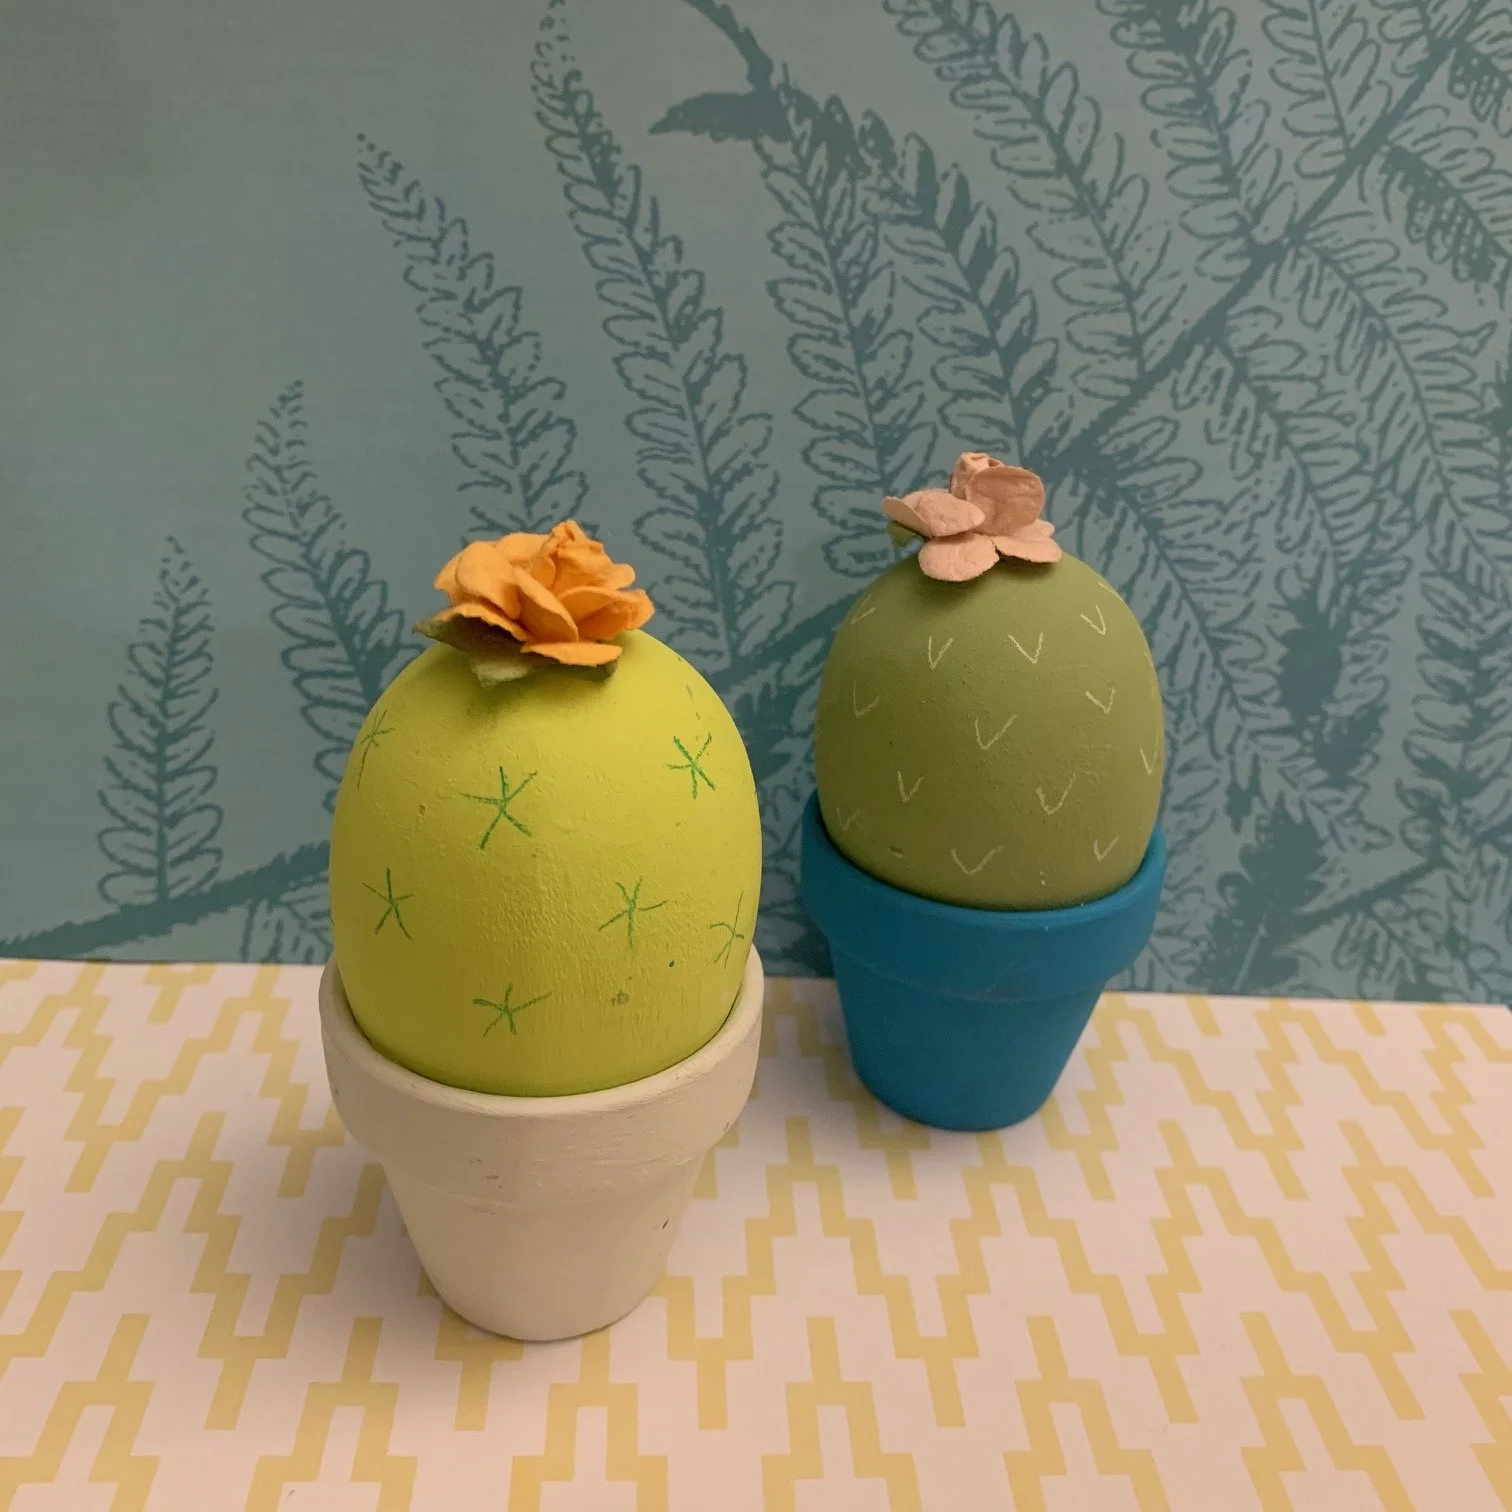
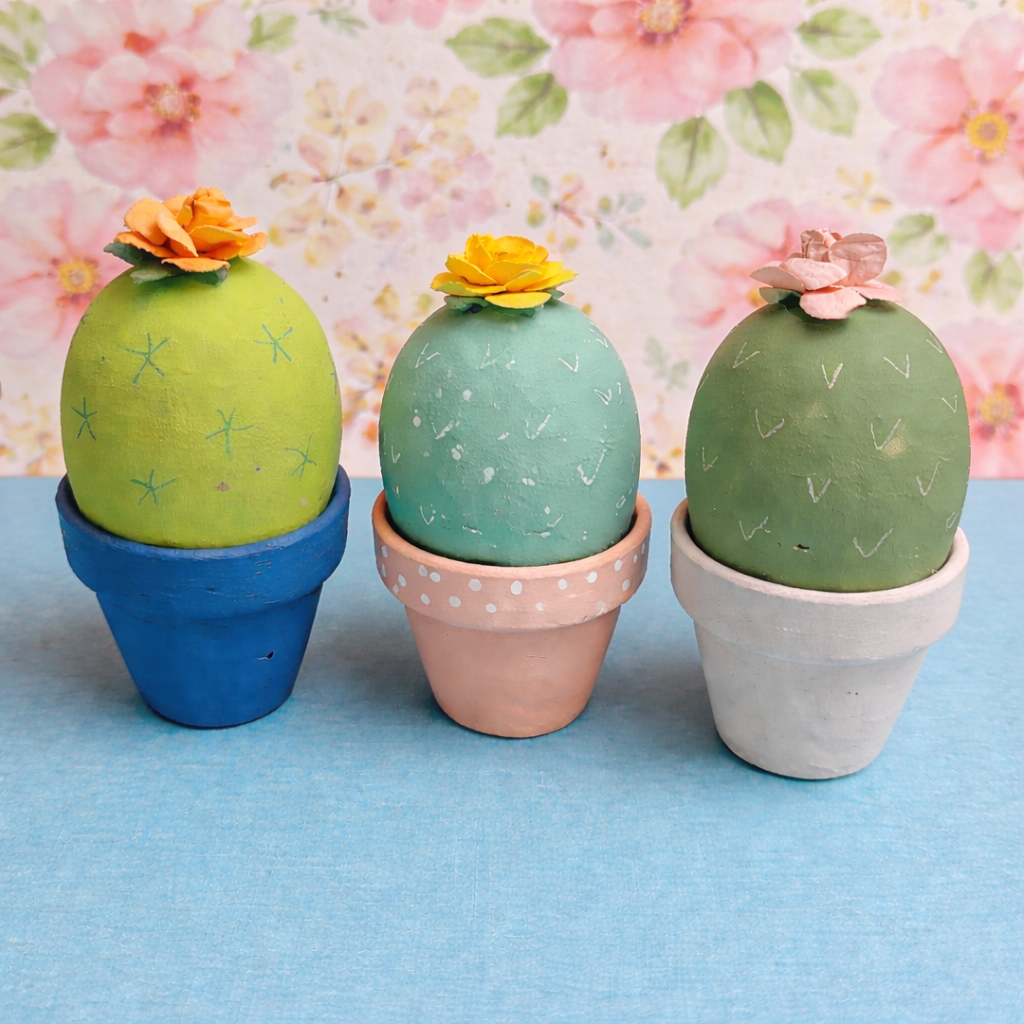
Start by painting your wooden eggs in different shades of green. I used a light lime green for one and a muted sage for the other to give them some variety.
Let dry completely, then add a second coat if needed.
2. Add cactus details
Using a fine-tip marker or small brush, draw simple cactus markings:
Little “X” shapes
Small V-shaped lines
Dots or tiny spikes
There’s no wrong way to do this—just keep it playful!
3. Paint the pots
Paint your mini pots any color you like. I went with:
A classic white pot
A bold blue pot
Let those dry fully before assembling.
4. Attach the flowers
Glue a small paper flower to the top of each egg. This instantly gives it that cute “blooming cactus” look.
5. Assemble
Place your painted egg inside the pot. If needed, add a bit of glue to secure it.